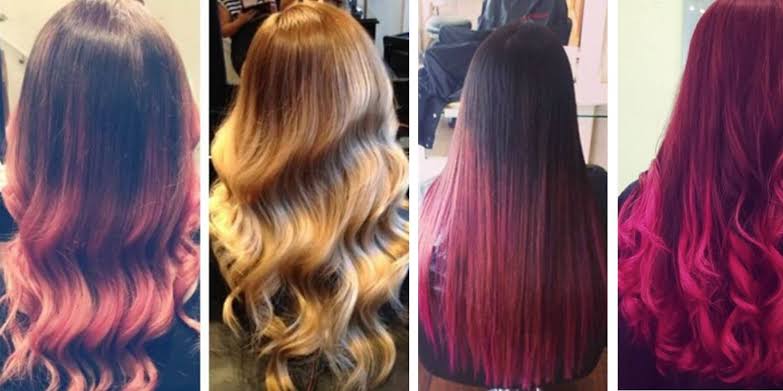
Hair color Applying & Styling Guide: Know The Essentials To Get Amazing colored Hair

A new season calls for a new you; if you’ve been longing to experiment with your hair, now is the time to act on your desire. And while professional intervention may promise long-lasting color, there’s no reason why you can’t achieve salon-esque colored locks at home.
At-home hair colors are the perfect, inexpensive alternative to professional salon treatments that aren’t falling within your budget. From touching up your greys to taking a fiery red hue for a spin, hair colors can instantly elevate your look – and mood – and exemplify myriad aspects of your personality.
However, when taking this task on, a trinity of patience, high-quality products, and a steady hand come into play. Read on to know everything you ever wanted to about coloring your hair at home, minus the hassle and expense.
- The Pre-coloring Procedure
Dyes and bleaches work best on unwashed, dry hair. Hence, you do not need to wash your hair and keep it damp for coloring. Your natural hair oils will protect your scalp during the coloring process. Avoid applying masks or hair oils to your mane two days before coloring your hair.
- Determine Your Natural Hair color
Before coloring your hair, you must be able to assess the natural color of your mane. Use a color chart to establish your right hair color, ranging from a light brown hue to jet-black tresses.
- Determine the Hair color You’re Looking For
When purchasing a hair color online, you should be sure about the shade you’ve picked. If required, you can scroll through social media to gauge how it would look in real time. Now, you must note the difference between your natural hair color and the hair color you desire. The difference between the two will give you a better idea about your color-lifting strategy.
- Establish a color-Lifting Strategy
Once you’ve determined the difference between your natural color and the one you desire, you must put in place your lifting strategy. Follow the below rules:
● 1-level Lift: use your target color with 20 vol developer
● 2-level Lift: use your target color with 30 vol developer
● 3-level Lift and more: first use bleach, then color or tone
- Determine the Process of Hair coloring
Your hair color can appear differently along the mid-lengths, the roots, and towards the end. Hence, you must apply different strategies to different parts of your hair. The amount of coloring required in varied regions also depends on the discoloration in that specific area. For instance, if your hair is grey closer to the roots and black along the lengths, focus on applying more product on the grey spots and less formula on the black portions of your strands.
- Section Your Hair to Prepare For coloring
Before mixing in your products, you must have a head of hair ready to be colored. Separate your strands into smaller sections and tie the loose strands up with the help of a hair clip. Begin with one section (usually the lower back section) to commence the coloring procedure.
- Prepare Your Hair color Mix
If you are a new colorist, use a kitchen scale to get the measurements right. Bear in mind that you whip up the hair color using correct measurements, as they directly affect the hue of your hair. Place an empty applicator bowl on the scale and set it to zero before pouring your products. Begin by pouring in your hair color, toner or bleach, and set the scale to zero again. Then, pour in the correct amount of developer. Whisk the contents in the bowl until you achieve a smooth, creamy paste ready to be applied to your hair. For more color lift, use bleach, leave on the concoction for a longer duration, or use a high-strength developer.
- Apply the Hair color Correctly
Once your mix is ready, it’s time to apply it to your hair. Use an adequate amount of the product mix and saturate your hair properly for a vibrant color. If your application is scanty, coat your hair with the product twice to cover areas that you may have missed. First, use a brush to segment your hair and coat each strand. Then, use your fingers (wearing gloves) to rub the product into your hair. If you’re applying bleach, ensure that the bleach is wet and doesn’t dry out during application. Similarly, when using a liquid toner, use your fingertips to rub the mixture thoroughly.
- Be Patient During Processing Time
Once the color is on, it’s a waiting game. For most hair colors, the processing time is between 30-40 minutes. Avoid over-processing your hair by leaving the product on for prolonged periods. Remember, the hair on your scalp processes faster than the hair elsewhere due to the heat of the scalp. Hence, watch the hair on your scalp closely. If the hair on your scalp looks done, it’s time to rinse the hair color off.
- Commence Emulsification
Before rinsing off the hair color, add a few drops of water to your scalp and rub it gently. Then, follow the same procedure around the hairline, the middle, and the nape. This process is known as emulsification, which helps lock in the formulation to ensure a long-lasting, vibrant color.
Conclusion
Coloring your hair at home is a far more convenient and feasible way to get the hair of your dreams. All it takes is finding the right product, creating a mixture with proper measurements, and a steady hand for application.


