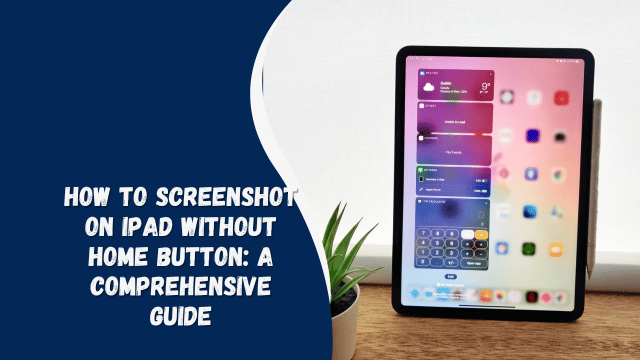
How to Screenshot on iPad Without Home Button: A Comprehensive Guide
In this digital age, capturing moments on your iPad has become essential. Whether it’s to save important information, share an interesting article, or show off your high score in a game, taking screenshots is a common practice. However, with the introduction of iPad models without a home button, the process might seem a bit puzzling. Fear not! In this article, we’ll guide you through the step-by-step process of taking screenshots on an iPad without a home button, making it easier than ever before.
A Quick Overview of iPad Models Without a Home Button:
Before we dive into the details, let’s briefly discuss the iPad models that lack a home button. These include the iPad Pro (latest models), iPad Air (latest models), and some versions of the standard iPad. The absence of the home button doesn’t mean you can’t take screenshots; it just requires a slightly different approach.
How to Screenshot on iPad Without Home Button:
Taking screenshots on an iPad without a home button may seem unfamiliar at first, but it’s actually quite simple. Here’s how you can do it:
- Use the Side Button: Press the Side button (also known as the Sleep/Wake button) located on the top right corner of your iPad. Simultaneously, press the Volume Up button. You’ll hear a familiar camera shutter sound, and the screen will flash briefly. This indicates that the screenshot has been successfully taken.
- View and Edit the Screenshot: Once the screenshot is taken, a small preview of it will appear in the bottom-left corner of the screen. Tap on the preview to open it. From here, you can edit the screenshot by adding annotations, highlights, or cropping it as needed. When you’re satisfied with the edits, tap “Done.”
- Save or Share the Screenshot: After editing the screenshot, you have the option to save it to your Photos app or share it directly with others. To save, tap the “Save to Photos” button. To share, tap the share icon (the square with an arrow pointing upward) and choose the desired sharing method, such as Messages, Mail, or social media.
Exploring Alternative Methods:
While the Side button and Volume Up button combination is the primary method for taking screenshots on an iPad without a home button, there are a couple of alternative methods you can consider:
- AssistiveTouch Shortcut: If you find it challenging to simultaneously press the Side button and Volume Up button, you can enable AssistiveTouch, a helpful accessibility feature. With AssistiveTouch, you can create a custom shortcut for taking screenshots. To enable AssistiveTouch:
- Go to “Settings” > “Accessibility” > “Touch” > “AssistiveTouch.”
- Toggle on AssistiveTouch.
- Tap on “Customize Top Level Menu” to add a new gesture.
- Choose “Screenshot” as the gesture. Now, a screenshot shortcut icon will appear on your screen, allowing you to take screenshots with a single tap.
- Apple Pencil (for iPad Pro): If you’re an Apple Pencil user, you can take advantage of its features for taking screenshots. Simply swipe up from the corner of the screen with the Apple Pencil to capture a screenshot. This method offers a hands-free approach and can be particularly useful if you’re using your iPad for creative tasks.
Tips for Better Screenshotting:
To enhance your screenshot-taking experience, consider these helpful tips:
- Explore Markup Tools: When editing your screenshots, don’t overlook the Markup tools available in the Photos app. These tools allow you to draw, write, add text, and highlight specific areas of the screenshot.
- Save Time with Screenshots: Screenshots are not only for capturing images; you can use them to save vital information. Instead of typing out a recipe or a list of instructions, screenshot the text and refer to it later.
- Organize Your Screenshots: As you take more screenshots, it’s a good idea to create folders or albums in the Photos app to keep things organized. This is especially useful if you take screenshots frequently for work or study purposes.
- Use Screenshots in Presentations: Screenshots can be a powerful visual aid in presentations. Incorporate screenshots to illustrate a point or showcase specific details.
Staying Updated with iOS Updates:
As technology continually evolves, it’s important to stay informed about any changes or updates to the iOS operating system that might affect screenshot functionality. Apple regularly releases software updates, and sometimes these updates can introduce new features or tweaks to existing ones.
To ensure you’re making the most of your iPad’s capabilities, here’s how you can stay updated:
- Check for Software Updates: Periodically check for software updates by going to “Settings” > “General” > “Software Update.” If there’s a new update available, it’s recommended to install it to keep your device running smoothly and to benefit from any enhancements.
- Explore Official Resources: Apple’s official website and support forums are excellent resources for learning about new features and functionality. You can find guides, tutorials, and FAQs that provide insights into using your iPad to its fullest potential.
- Follow Tech Blogs and Communities: Tech blogs, forums, and communities often share valuable tips, tricks, and updates related to iOS devices. Engaging with these online communities can help you discover new ways to maximize your iPad experience.
How To Record On Snapchat Without Holding The Button On Android
Frequently Asked Questions (FAQs):
Can I still take screenshots if my iPad has a home button?
Absolutely! If your iPad has a home button, you can take screenshots using the traditional method by pressing the Home button and the Power button simultaneously.
Will this method work on older iPad models?
No, this method is specifically for iPad models without a home button. On older models with a home button, you should use the Home button and Power button combination.
What if my Side button or Volume buttons are not working?
If you’re experiencing issues with the Side button or Volume buttons, it’s essential to get your iPad checked by a certified technician. In the meantime, you can still take screenshots using AssistiveTouch, a feature available in Accessibility settings.
Can I take multiple screenshots in a row?
Yes, you can take multiple screenshots in a row by simply repeating the process mentioned above. Each screenshot will be saved as a separate image in your Photos app.
Does this method work in all apps?
Yes, you can use this method to take screenshots in most apps and on the home screen. However, some apps may restrict screenshot capabilities for security or privacy reasons.
Do I need to enable any settings to take screenshots?
Generally, there’s no need to enable specific settings for screenshot functionality. It’s a built-in feature of the iPad. Just follow the steps mentioned above.
Conclusion:
Taking screenshots on an iPad without a home button is straightforward once you know the method. The combination of the Side button and Volume Up button replaces the traditional home button method. Whether you’re using the latest iPad Pro, iPad Air, or any newer models, this guide ensures you’ll capture and share moments seamlessly. Now you can screenshot on your iPad with confidence, even without a home button!
Remember, technology evolves, and it’s essential to stay updated with the latest methods. With this guide, you’ll be screenshotting like a pro on your iPad, whether it has a home button or not.